The UniPrint121EB SSLAW and the UniPrint121EB SSHSLA are top apply machines. These machines have very few differences and essentially operate the same, and as such, this page will cover both. Within this page you will find documentation, support videos, and spare parts for the 121EB SSLAW / SSHSLA.
Would you like IMI to repair your Machine?
If you would like IMI to repair your machine, click here to view the process.
Documentation
- UniPrint121EB Quick Start
- UniPrint121EB SSLAW/SSHSLA 1.0
Operator Manual
SSLAW 1.0 Wiring Diagram
SSHSLA 1.0 Wiring Diagram - UniPrint121EB SSLAW 2.0
Operator Manual
Wiring Diagram - UniPrint121EB SSHSLA 2.0
Operator Manual
Wiring Diagram - S84ex Operator Manual
- S84NX Operator Manual
- UniPrint121EB SSLAW w/ S84NX Print Engine – Recommended Spare Parts
- UniPrint121EB SSHSLA w/ S84NX Print Engine – Recommended Spare Parts
- UniPrint121EB SSHSLA w/ S84-ex Print Engine – Recommended Spare Parts
- Support QR Codes for UniPrint Models
Videos
The videos below give instruction on tasks necessary to maintain/operate Innovative Machine equipment.
Each video below is demonstrated on either a UniPrint121EB SSLAW or SSHSLA machine, but the steps/procedures will be the same for both models:
UniPrint121EB SSLAW/SSHSLA Label Loading
UniPrint121EB SSLAW/SSHSLA Cleaning
- UniPrint121EB SSLAW/SSHSLA Label Loading
- UniPrint121EB SSLAW/SSHSLA Cleaning
Each video below is demonstrated on either a Left Hand or Right Hand S84 Print Engine, but the steps/procedures will be the same for both models:
S84 Gap Sensor Calibration
Installing a Stage 1 Kit in a S84 Print Engine
Installing a Stage 2 Kit in a S84 Print Engine
Using an EXT DB-25 Tester on a S84 Print Engine
Tracking Collar Replacement
- S84 Gap Sensor Calibration
- Installing a Stage 1 Kit in a S84 Print Engine
- Installing a Stage 2 Kit in a S84 Print Engine
- Using an EXT DB-25 Tester on a S84 Print Engine
- Tracking Collar Replacement
Each video below is demonstrated on either a Left Hand or Right Hand S84 Print Engine, but the steps/procedures will be the same for both models:
S84NX – Life and Head Count
S84NX – Offset Adjustment
S84NX – Stage 1 Kit
S84NX – Stage 2 Kit
S84NX – Gap and I-Mark Calibration
- S84NX – Life and Head Count
- S84NX – Offset Adjustment
- S84NX – Stage 1 Kit
- S84NX – Stage 2 Kit
- S84NX – Gap and I-Mark Calibration
Replacement Parts
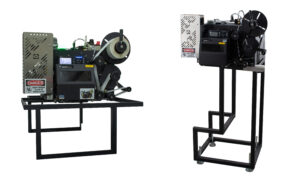
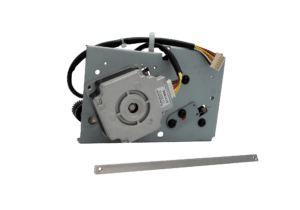
The following photos display the UniPrint121EB SSLAW machine and its spare parts.
Hover over the teal dots to view spare parts and part numbers for the machine.
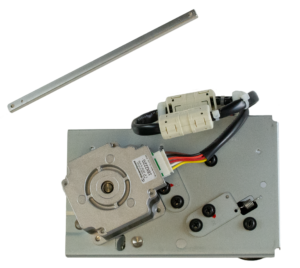
The following photos display the UniPrint121EB SSHSLA machine and its spare parts.
Hover over the teal dots to view spare parts and part numbers for the machine.
Left Hand S84ex Stage 1 Kit
Coupa #7187295
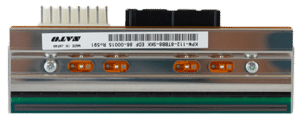
S84ex Print Plate
Coupa #7121254
Left Hand S84ex Stage 2 Kit
Coupa #7187299
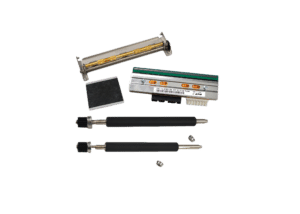
S84NX Stage 1 Kit
Coupa #7187471
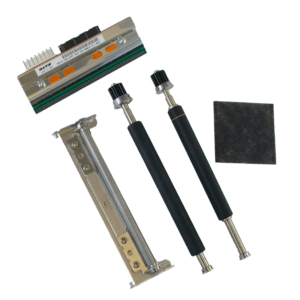
S84NX Print Plate
Coupa #7187459
Left Hand S84NX Stage 2 Kit
Coupa #7187472
IMI Tool Kit
Coupa #7187286
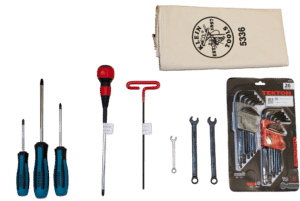
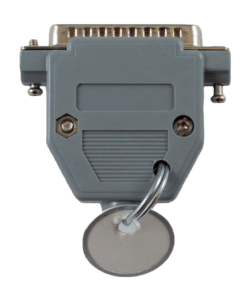
IMI Sato S84 Tester
Coupa #7187391
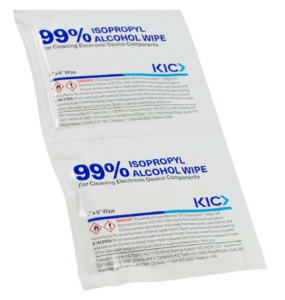
EZ Wipes
Coupa #7186057
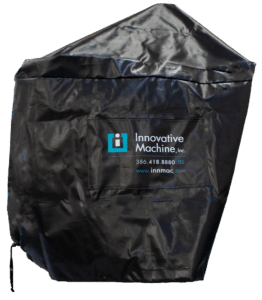
IMI Printer Cover
Coupa #7187271
FAQs
S84ex Print Engine
View the pdf below to correct inconsistent label presentation on the S84-ex Print Engine.
View the pdf below to correct label tracking problems on the S48-ex Print Engine.
View the pdf below to install the RFID tuning insert.
View the pdf below to correct RFID Encoding Failures.
View the pdf below to adjust the Pressure Roller.
S84NX Print Engine
View the pdf below to correct inconsistent label presentation on the S84NX Print Engine.
View the pdf below to correct label tracking problems on the S84NX Print Engine.
View the pdf below to calibrate the Gap and I-Mark Sensors.
View the pdf below fix Error 1008 – Out of Paper.
View the pdf below to install the RFID tuning insert.
View the pdf below to correct RFID Encoding Failures.
View the pdf below to capture a Hex Dump. This dump can then be used to determine if there is a problem with the label data.
This overview provides operators with a step-by-step guide for properly loading, switching, and saving label profiles on the S84NX print engine.
It focuses on transitioning between Smart (thin) and Thick label stock profiles to ensure consistent print quality and reliable applicator performance.
*Please note that this may not be installed on every S84NX print engine.
SSLAW/SSHSLA Machine
View the pdf below to install the home sensor retainer.
View the pdf below to adjust the Home Sensor.
View the pdf below to install and adjust the Banner Amplifiers.
View the pdf below to install and adjust the Fastus Amplifiers.
View the pdf below to replace the actuator arm.
View the pdf below to adjust the actuator arm.
View the pdf below to calibrate the Banner package amplifier.
View the pdf below to correct the package fiber from being damaged on the SSLAW/SSHSLA Machine
View the pdf below to replace the Springs and Plungers in the Buffer Assembly.
View the pdf below to troubleshoot a vacuum problem on the SSLAW/SSHSLA Machine
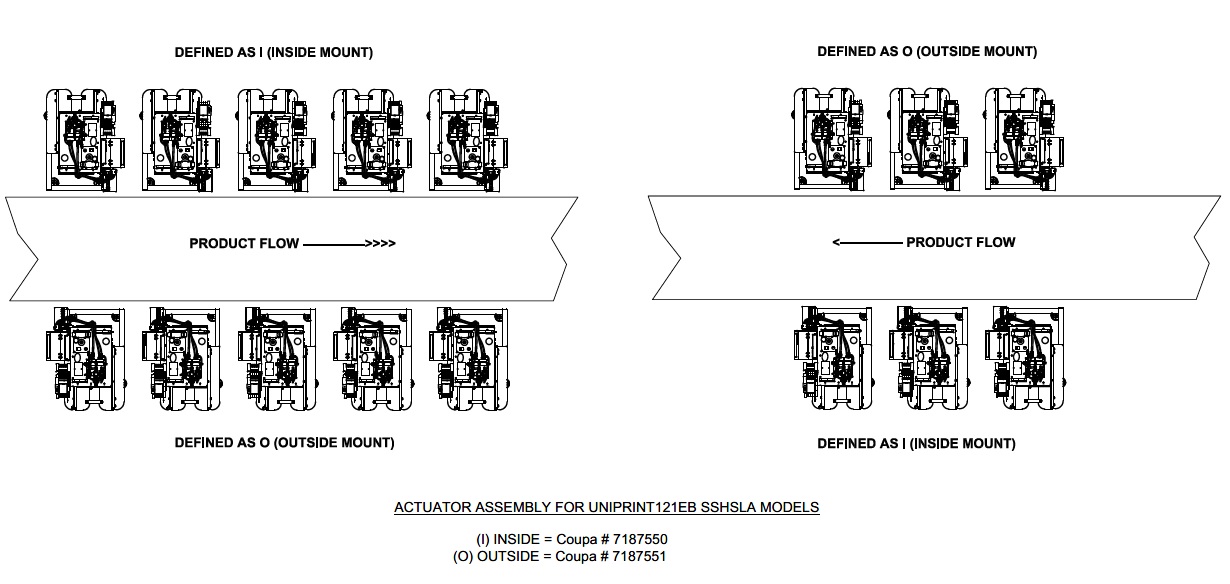
The sole distinction lies in the orientation of the package sensor relative to the direction of package movement.